Installing PHPMyAdmin on Windows XP Pro 1
What do we have in this session 1?
-
Pre requirements
-
Configuring IIS 6.0 Web Server
-----------------------------------------------
-
Creating the PHPMyAdmin Config File
-
phpmyadmin Configuration Storage (MySQL)
-
Creating a Controluser
-
More Controluser Permission Assignments
-
Establishing the Database Connection
-
Testing Logging to PHPMyAdmin
-
Configuration for PHP v5
-
More Advanced Settings
-
The Non root Login
Pre requirements
The requirements to install phpmyadmin on IIS web server and Windows XP Pro for this session are listed in the following table.
|
Web server |
IIS already configured successfully on Windows XP Pro and .PHP extension has been mapped. |
|
PHP |
PHP already configured successfully. You need PHP 5.2.0 or newer, with session support and the Standard PHP Library (SPL) extension. To support uploading of ZIP files, you need the PHP zip extension. For proper support of multibyte strings (eg. UTF-8, which is currently default), you should install mbstring and ctype extensions. You need GD2 support in PHP to display inline thumbnails of JPEGs ("image/jpeg: inline") with their original aspect ratio. When using the "cookie" authentication method, the mcrypt extension is strongly suggested for most users and is required for 64 bit machines. Not using mcrypt will cause phpmyadmin to load pages significantly slower. To support upload progress bars, please see FAQ 2.9. |
|
MySQL |
5.0 or newer and already configured successfully. |
|
Web browser |
With cookies enabled. |
|
|
In this tutorial session we'll place the phpmyadmin files in a directory called 'phpmyadmin' under the web root directory of a localhost website. In the real implementation, the localhost should be replaced by the registered domain name. Because phpmyadmin enables you to directly manipulate, and even delete entire databases and users, it is highly recommended that you secure your phpmyadmin installation using SSL. This can be done by purchasing a certificate from a third party vendor with some cost or by creating a self signed certificate for IIS web server (IIS server) yourself at no cost. The following steps try to demonstrate how to configure IIS web server on Windows XP Pro.
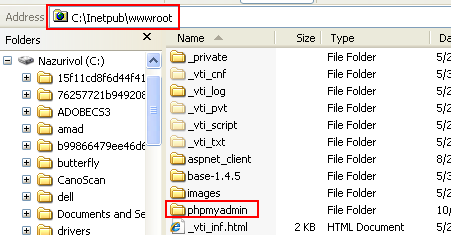
Firstly, please download phpmyadmin ZIP file from phpmyadmin.net. Create a directory 'phpmyadmin' under the web root directory (C:\Inetpub\wwwroot) with all small letters. Uncompress or put all the phpmyadmin files and folders under 'phpmyadmin' folder just created.
Configuring IIS 6.0 Web Server
In order to configure IIS, do the following steps:
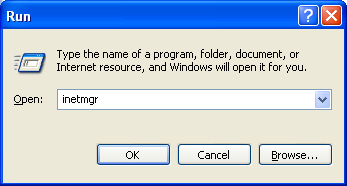
a. Firstly, open IIS Webserver from Start > Run: inetmgr (or Start > All Programs > Administrative Tools > Internet Information Services).
|
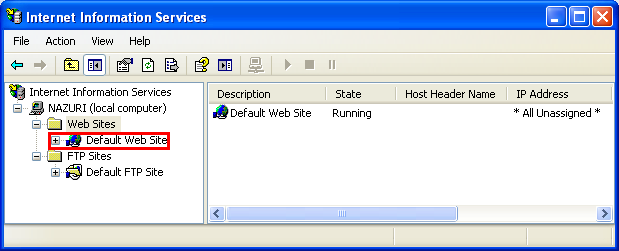
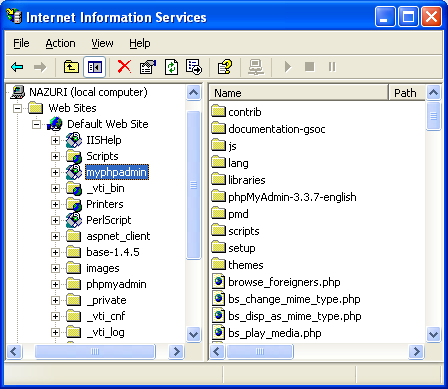
b. In IIS manager expand SERVER_NAME > Web Sites and select Default Web Site.
c. In the Right pane right click in white space and select New > Virtual Directory (or select the Default Web Site > right click > New > Virtual Directory).

d. In the Virtual Directory creation Wizard welcome page, click Next.

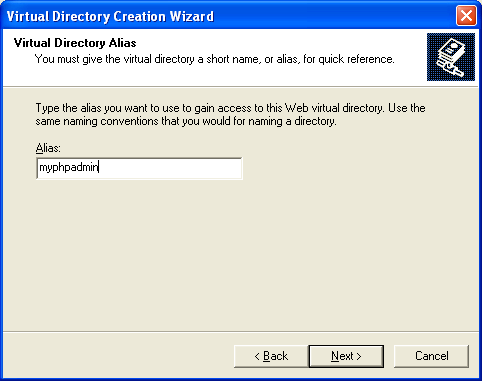
e. Give a directory Alias (name) as phpmyadmin (this is a logical name recognized by IIS and in this case we use similar directory name for physical and logical) and click Next.
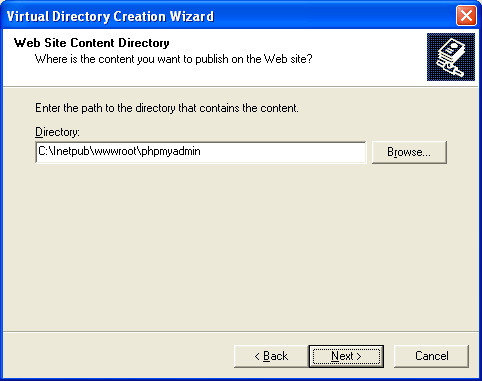
f. Click on Browse button and navigate to "C:\Inetpub\wwwroot\phpmyadmin"
--------------------------------------------------------------------
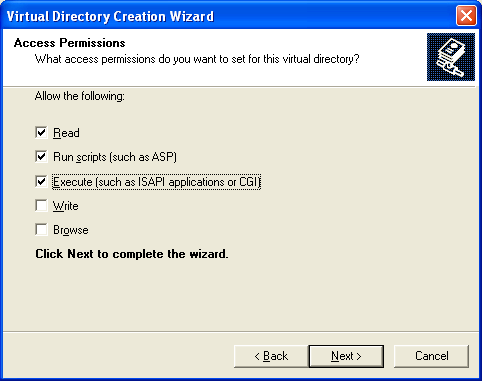
g. Select "Read", "Run Script (such as ASP)" & "Execute (such as ISAPI applications or CGI)" and click Next.

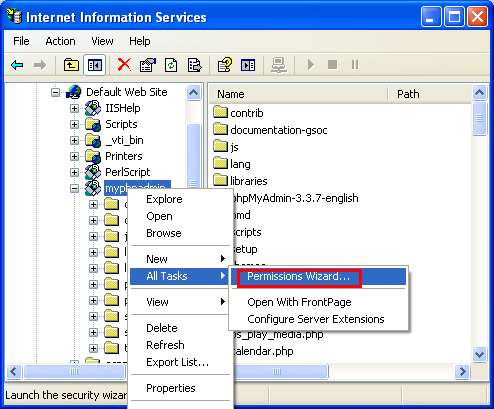
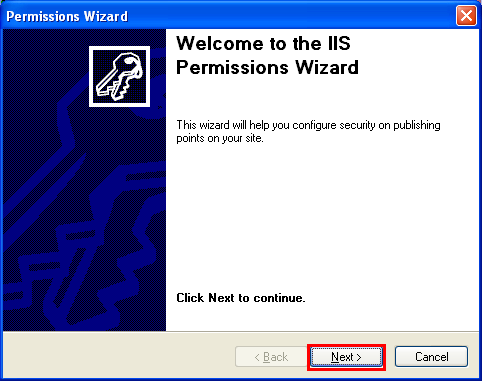
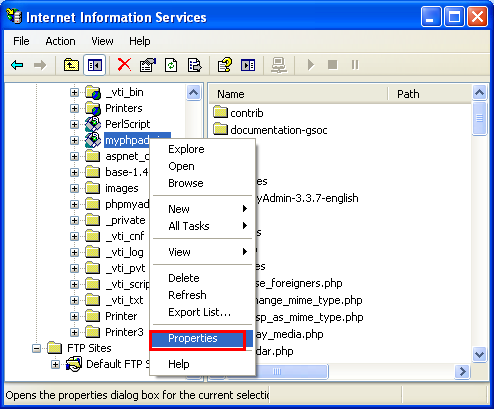
h. Now Right click on the phpmyadmin virtual directory, select All Tasks and then Permission Wizard.
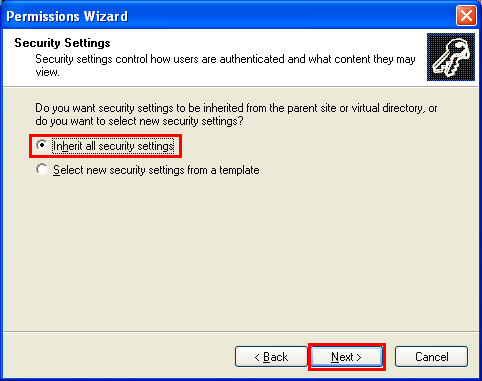
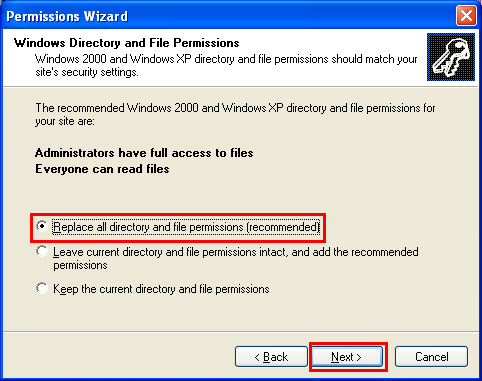
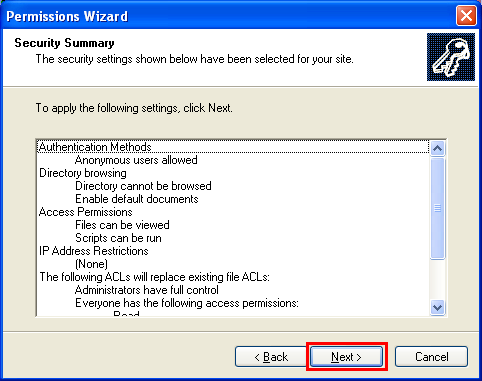
i. Give "Read & Execute" permissions to IUSR_xxxxx and inherit the permissions.
If you encounter the following message, you may want to fix the parent node first (Default Web Site). Else, just click Yes.

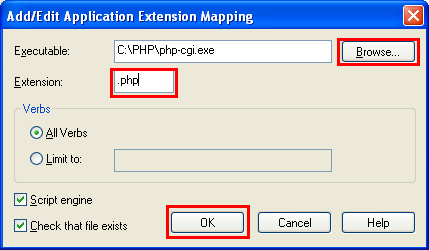
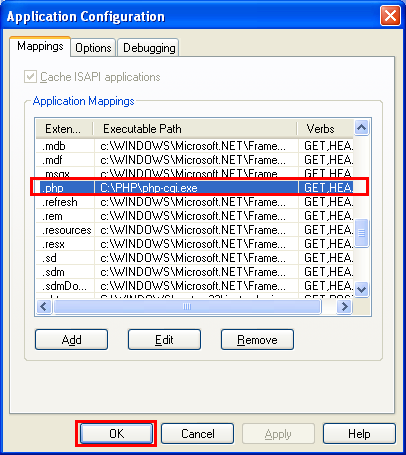
j. Right click on the phpmyadmin virtual directory > Properties > Virtual Directory > Configuration button and map .php extension to PHP executable.
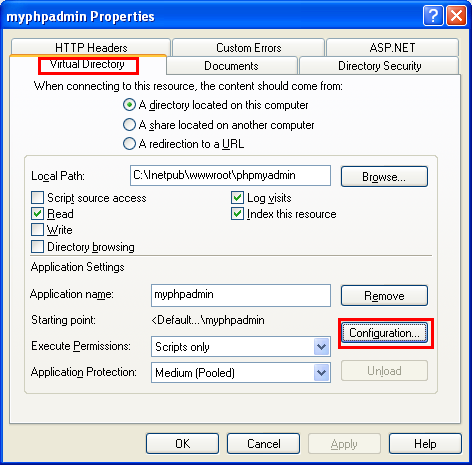
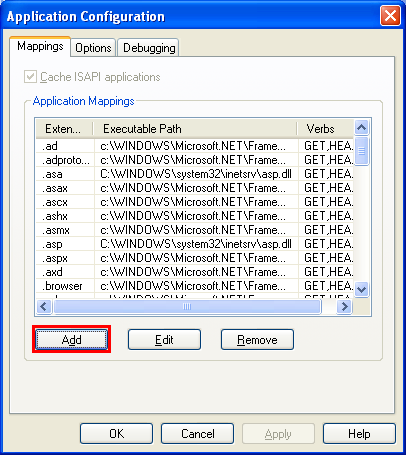
In this case we select All Verbs for the Verbs. You may want to limit to GET, HEAD, POST only. Click OK.
Many people have difficulty understanding the concept of user management with regards to phpmyadmin. When a user logs in to phpmyadmin, that username and password are passed directly to MySQL. phpmyadmin does not do the account management on its own (other than allowing one to manipulate the MySQL user account information); all users must be valid MySQL users.
< Java and Opensource Friends | PHPMyAdmin 2 >