< C++ .NET Properties 2 | Main | C++ .NET Properties 4 >
Properties 3
get me and set me!
What we have in this page?
Errors in Properties
What happens if a property get or set method encounters an error? Consider the following code:
The property set method needs to communicate that the value passed in isn’t acceptable, and exceptions provide the best way to do this. You could modify the set function for the AProperty to check its argument like this:
If anyone tries to set the age to a negative value, an ArgumentException that has to be caught in the calling code will be thrown. However, you should provide a complete try-catch-throw block of code and appropriate namespace. |
Read-Only and Write-Only Properties
You don’t always have to provide get and set methods for a property. If you don’t provide a set method, you end up with a read-only property. If you omit the get method, you’ll have a write-only property (which is possible, but a lot less common than the read-only variety). The following exercise shows how to implement a read-only property, and it also illustrates how to create a derived property. You’ll change the Person class from the previous exercise so that it includes a date of birth rather than an age. The derived AProperty property will then calculate the person’s age from the date of birth; it’s obviously a derived property because you can’t change someone’s age without changing his or her date of birth as well. It’s also obviously a read-only property because it’s always calculated and cannot be set by users of the class.
1. Either start a new CLR Console Application project, or modify the one from the previous exercise. Enter or edit the definition of the Person class so that it looks like the following code. Place it after using namespace System; and before the main() method:
ref class Person
{
String^ name;
int dd, mm, yyyy;
public:
// Person class constructors
Person() { name = nullptr; dd = 0; mm = 0; yyyy = 0; }
// second constructor...
Person(String^ n, int d, int m, int y)
{
name = n;
dd = d; mm = m; yyyy = y;
}
// The Name property
property String^ NProperty
{
String^ get() { return name; }
void set(String^ s) { name = s; }
}
// getting the year of birth...
property int AProperty
{
// The read-only Age property
int get()
{
DateTime now = DateTime::Now;
return now.Year - yyyy;
}
}
};
The class now has four data members: a String for the name and three integers to hold the date of birth. A second constructor for the class is used to create an object with the date of birth set from the arguments. It would be neater to use a System::DateTime object to represent the date of birth, but you can’t have pointers to managed types as members of a ref class. The AProperty property now has only a get method, which retrieves a DateTime object representing the current date and time and then calculates the age from the difference between the current year and the stored year.
2. Use the NProperty and AProperty properties as you did in the previous example, shown below:
int main(array<System::String ^> ^args)
{
// Create a Person object
Person^ pp = gcnew Person("Mike Stone", 5,7,1971);
// Access the Name and Age properties
Console::WriteLine(L"Age of {0} is {1}", pp->NProperty, (Object^)pp->AProperty);
return 0;
}
You can’t set the AProperty property (pp->AProperty = 38;) because you haven’t provided a set function, and you’ll get a compiler error if you try to assign to the AProperty property.
3. Build and run your program. The following output should be expected.

Implementing Indexed Properties
Now that you know how to implement a scalar property, let’s move on to consider indexed properties, also known as indexers. These are useful for classes that have data members that are collections of items, and where you might want to access one of the items in the collection.
The Bank Example
An example might be a Bank class that maintains a collection of Accounts. If you’re not using properties, you’d tend to see code such as the following being used to access members of the Bank class using a method (getAccount):
// Get a pointer to one of the Accounts held by the Bank
Account^ pacc = theBank->getAccount(1234567);
An indexed property will let you access the Account members using array notation, like this:
// Get a pointer to one of the accounts held by the Bank
Account^ pacc = theBank->Account[1234567];
You can implement get and set methods for indexed properties so that you can use them on both sides of the equal sign (=). The following code fragment uses two properties, with the first indexed property giving access to an account and the second giving access to an overdraft limit:
// Set the overdraft limit for one of the accounts
theBank->Account[1234567]->OverDraft = 250.0;
The following longer exercise walks you through implementing the Bank and Account classes, and it also shows you how to create and use both the scalar and indexed properties.
Implementing the Bank Class
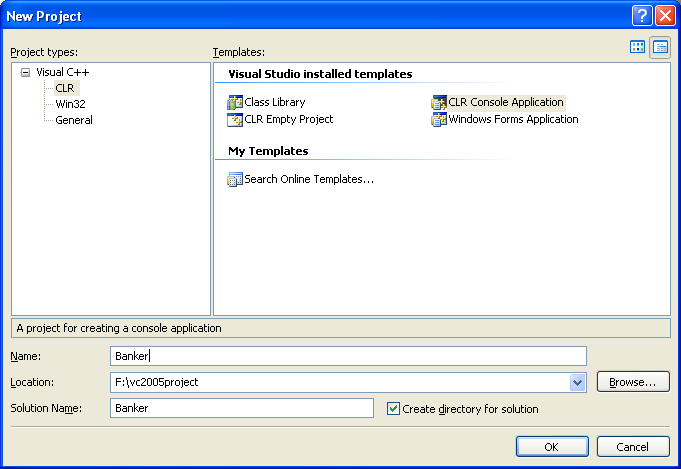
1. Start Visual C++/Studio .NET, and create a new CLR Console Application project named Banker.
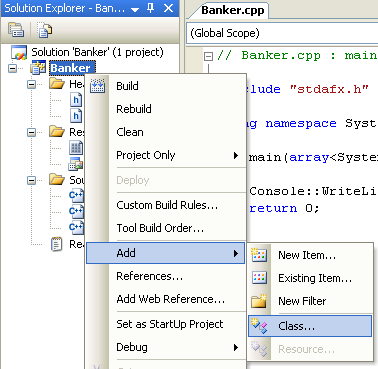
2. Add the definition for a new class named Bank by right-clicking the project name in Solution Explorer, choosing Add from the pop-up menu, and then choosing Class from the hierarchical menu that appears.
----------------------------------------------------
3. The Add Class dialog box opens, in which you choose the type of class you’re going to add. Make sure that the C++ Class Categories and C++ Class Template is selected before you click Add.

4. The Generic C++ Class Wizard constructs the skeleton of a new class for you. Fill in the fields (when the Class name: field is filled, other fields will be filled automatically, just accept the given names) with Bank as shown in the following figure. Make sure the Managed tick box is selected and then click Finish.
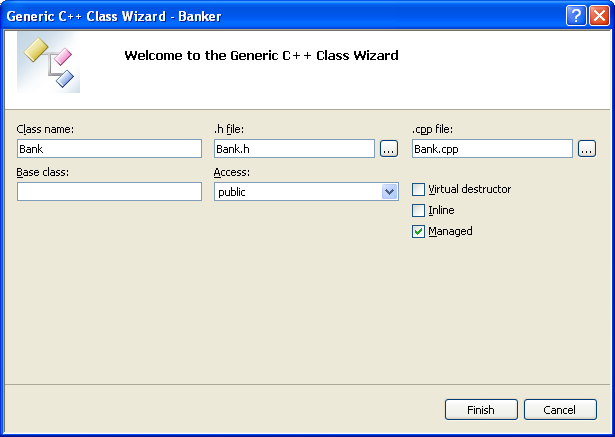
The wizard creates a generic class that simply consists of a constructor and a destructor. The class definition will be in the Bank.h file and the class implementation will be in the Bank.cpp file. The default Bank.h header and Bank.cpp files are shown below.
#pragma once
ref class Bank
{
public:
Bank(void);
};
#include "StdAfx.h"
#include "Bank.h"
Bank::Bank(void)
{ }
5. Open the implementation file Bank.cpp, and make the corresponding changes. Add a call to Console::WriteLine in the constructor so that you can verify that it has been called.
Bank::Bank(void)
{
Console::WriteLine(L"Bank: constructor");
}
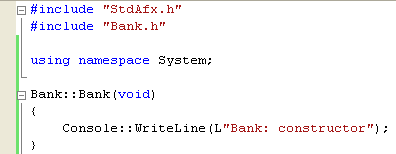
Don’t forget to put the using namespace System; in order to use the Console::WriteLine. The file should look like this when you’ve finished editing:
#include "StdAfx.h"
#include "Bank.h"
using namespace System;
Bank::Bank(void)
{
Console::WriteLine(L"Bank: constructor");
}
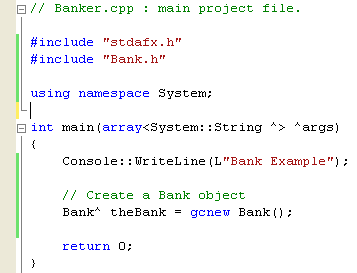
6. To ensure that everything is correct, open the Banker.cpp file and add code to the main() function to create a Bank object:
int main(array<System::String ^> ^args)
{
Console::WriteLine(L"Bank Example");
// Create a Bank object
Bank^ theBank = gcnew Bank();
return 0;
}
7. You must also include Bank.h to the Banker.cpp file so that the compiler will know where to locate the declaration of the Bank class. Add the following code to Banker.cpp after the #include "stdafx.h" line:
#include "Bank.h"
8. The final version of the Banker.cpp is shown below.
9. Compile and run this code and you should see the constructor message being printed on the console as shown below.
