< .Net Type, Variable & Operator 2 | Main | .Net Type, Variable & Operator 4 >
Data Types, Variables and Operators 3
The discussion and the codes used supposed to be based on the new C++ .NET. The following are the topics in this part.
Adding Member Variables to Classes
|
-
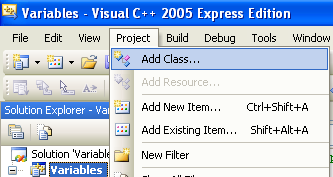
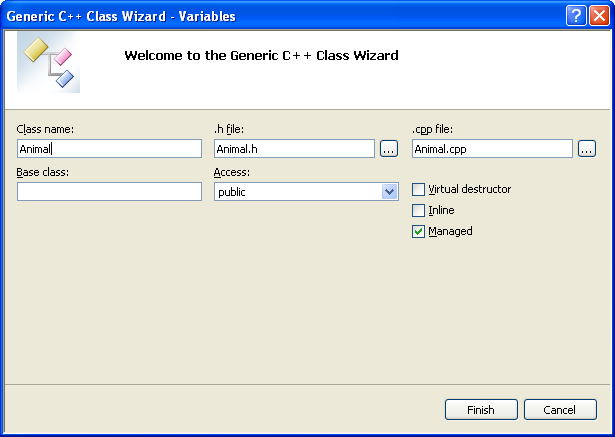
From the Project menu, select Add Class. The Add Class dialog box appears.
-
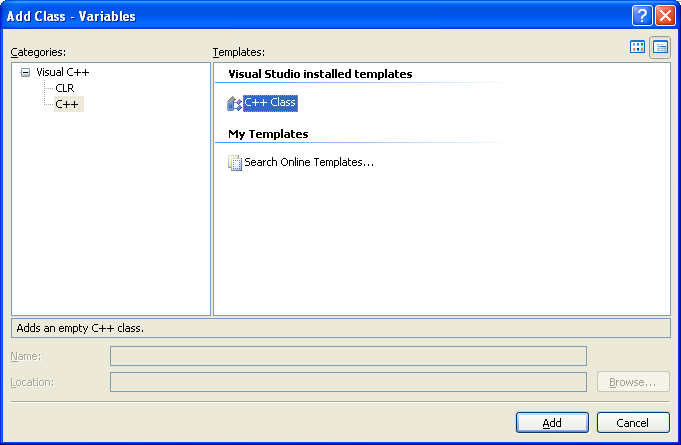
Set the Categories to C++ and Template to C++ Class. Click Add. The Generic C++ Class Wizard dialog box appears.
-
Type Animal in the Class name text box. Notice how default names for the header and source files are created automatically.
-
Leave the Base class text box blank.
-
In the Access list, select public. (Note that public is the default, so it should already be selected.)
-
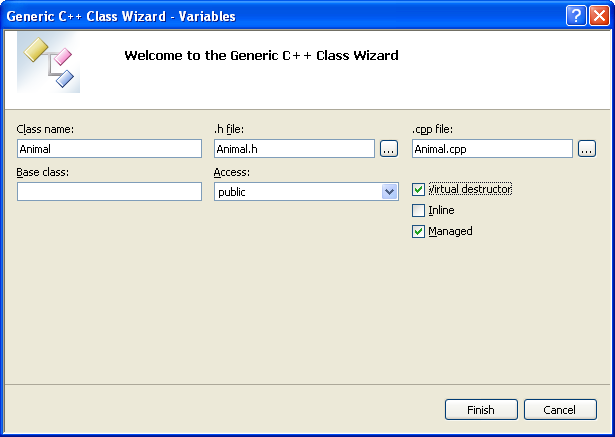
Check the Virtual destructor check box.
-
Click Finish.
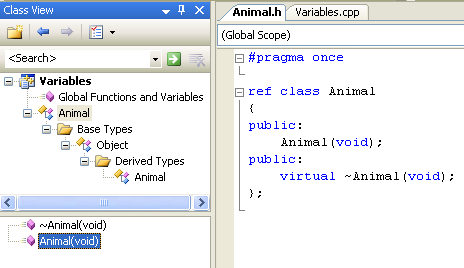
Note that the header file for the new class, Animal.h, has been loaded into the main window. In Solution Explorer, the Animal.cpp file has been added to the Source Files folder and the header file, Animal.h, has been added to the Header Files folder.
 |
In the Class View window, if you expand the Variables project node, you’ll see that the new Animal class has been added to the project. If you expand the Animal class, you’ll see the default constructor, Animal(void), and destructor, ~Animal(void), for the class.
-
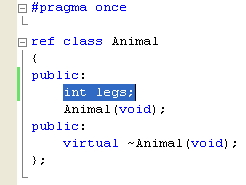
Add the following member variable to the Animal class. For Visual Studio, you may select the Animal class folder in the Class View and right click. Then select Add Member Variable menu.
| Name | Type | Access |
| legs | int | public |
|
Table 5 | ||
In this exercise, you’ve seen how to create a new class using Visual C++/Studio and how to add members to it.
Part 1 | Part 2 | Part 3 | Part 4 | Part 5 | Part 6 | Part 7 | Part 8 | Part 9 | Part 10